Linux Server Configuration
个人服务器配置流程
1. 添加用户并赋予 sudo 权限
bash
adduser --disabled-password <your_username>
usermod -aG sudo <your_username>
su - <your_username>
然后添加.ssh/authorized_keys文件。
2. 安装 zsh、oh-my-zsh
bash
sudo apt install -y zsh
sudo chsh -s $(which zsh) $USER
sh -c "$(curl -fsSL https://raw.githubusercontent.com/ohmyzsh/ohmyzsh/master/tools/install.sh)"
安装oh-my-zsh插件(命令高亮,自动补全):
bash
git clone https://github.com/zsh-users/zsh-syntax-highlighting.git ${ZSH_CUSTOM:-~/.oh-my-zsh/custom}/plugins/zsh-syntax-highlighting

git clone https://github.com/zsh-users/zsh-autosuggestions ${ZSH_CUSTOM:-~/.oh-my-zsh/custom}/plugins/zsh-autosuggestions
配置~/.zshrc:
bash
export ZSH="$HOME/.oh-my-zsh"

ZSH_THEME="AEsir"
export VIRTUAL_ENV_DISABLE_PROMPT=1
plugins=(git web-search jsontools z zsh-autosuggestions zsh-syntax-highlighting)

source $ZSH/oh-my-zsh.sh
unset PROMPT_DIRTRIM

alias zshconfig="mate ~/.zshrc"
alias ohmyzsh="mate ~/.oh-my-zsh"

# some more ls aliases
alias ll='ls -alF'
alias la='ls -A'
alias l='ls -CF'
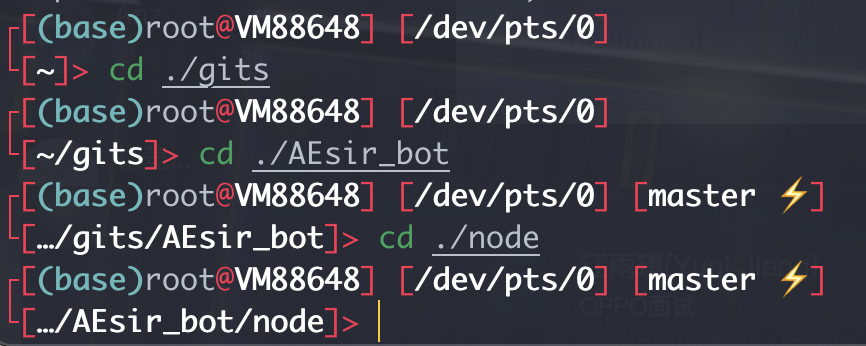
个人主题:
bash
short_path() {
  local p="${PWD/#$HOME/~}"          # ~/ 开头的友好路径
  local -a segs=("${(s:/:)p}")       # 按 / 拆分;zsh 支持负索引
  local count=${#segs[@]}

  # 只有 ~ 或 / 的场合
  (( count <= 2 )) && print -r -- "$p" && return

  # 从 ~ 开头:始终保留 ~ 与最后两段
  if [[ ${segs[1]} == "~" || ${segs[1]} == "" && ${segs[2]} == "~" ]]; then
    print -r -- "…/${segs[-2]}/${segs[-1]}"
  else
    # 普通绝对路径:用省略号开头
    print -r -- "…/${segs[-2]}/${segs[-1]}"
  fi
}


env_prompt() {
  if [[ -n "$CONDA_DEFAULT_ENV" ]]; then
    print -r -- "%{$fg[cyan]%}(${CONDA_DEFAULT_ENV})%{$reset_color%}"
  elif [[ -n "$VIRTUAL_ENV" ]]; then
    print -r -- "%{$fg[cyan]%}(${CONDA_DEFAULT_ENV})%{$reset_color%}"
  fi
}

PROMPT=$'%{$fg[red]%}┌[%{$fg_bold[white]%}$(env_prompt)%n%{$reset_color%}%{$fg[red]%}@%{$fg_bold[white]%}%m%{$reset_color%}%{$fg[red]%}] [%{$fg_bold[white]%}/dev/%y%{$reset_color%}%{$fg[red]%}] %{$(git_prompt_info)%}%(?,,%{$fg[red]%}[%{$fg_bold[white]%}%?%{$reset_color%}%{$fg[red]%}])
%{$fg[red]%}└[%{$fg_bold[white]%}$(short_path)%{$reset_color%}%{$fg[red]%}]>%{$reset_color%} '
PS2=$' %{$fg[red]%}|>%{$reset_color%} '

ZSH_THEME_GIT_PROMPT_PREFIX="%{$fg[red]%}[%{$fg_bold[white]%}"
ZSH_THEME_GIT_PROMPT_SUFFIX="%{$reset_color%}%{$fg[red]%}] "
ZSH_THEME_GIT_PROMPT_DIRTY=" %{$fg[red]%}⚡%{$reset_color%}"
写入到~/.oh-my-zsh/themes/AEsir.zsh-theme,主要优化了路径显示:
3. 配置vim
安装vim以及插件管理器、插件:
bash
sudo apt install -y vim

mkdir -p ~/.vim/plugged && cd ~/.vim/plugged
git clone git://github.com/jiangmiao/auto-pairs.git
git clone https://github.com/vim-airline/vim-airline
git clone https://github.com/preservim/nerdtree.git

curl -fLo ~/.vim/autoload/plug.vim --create-dirs https://raw.githubusercontent.com/junegunn/vim-plug/master/plug.vim
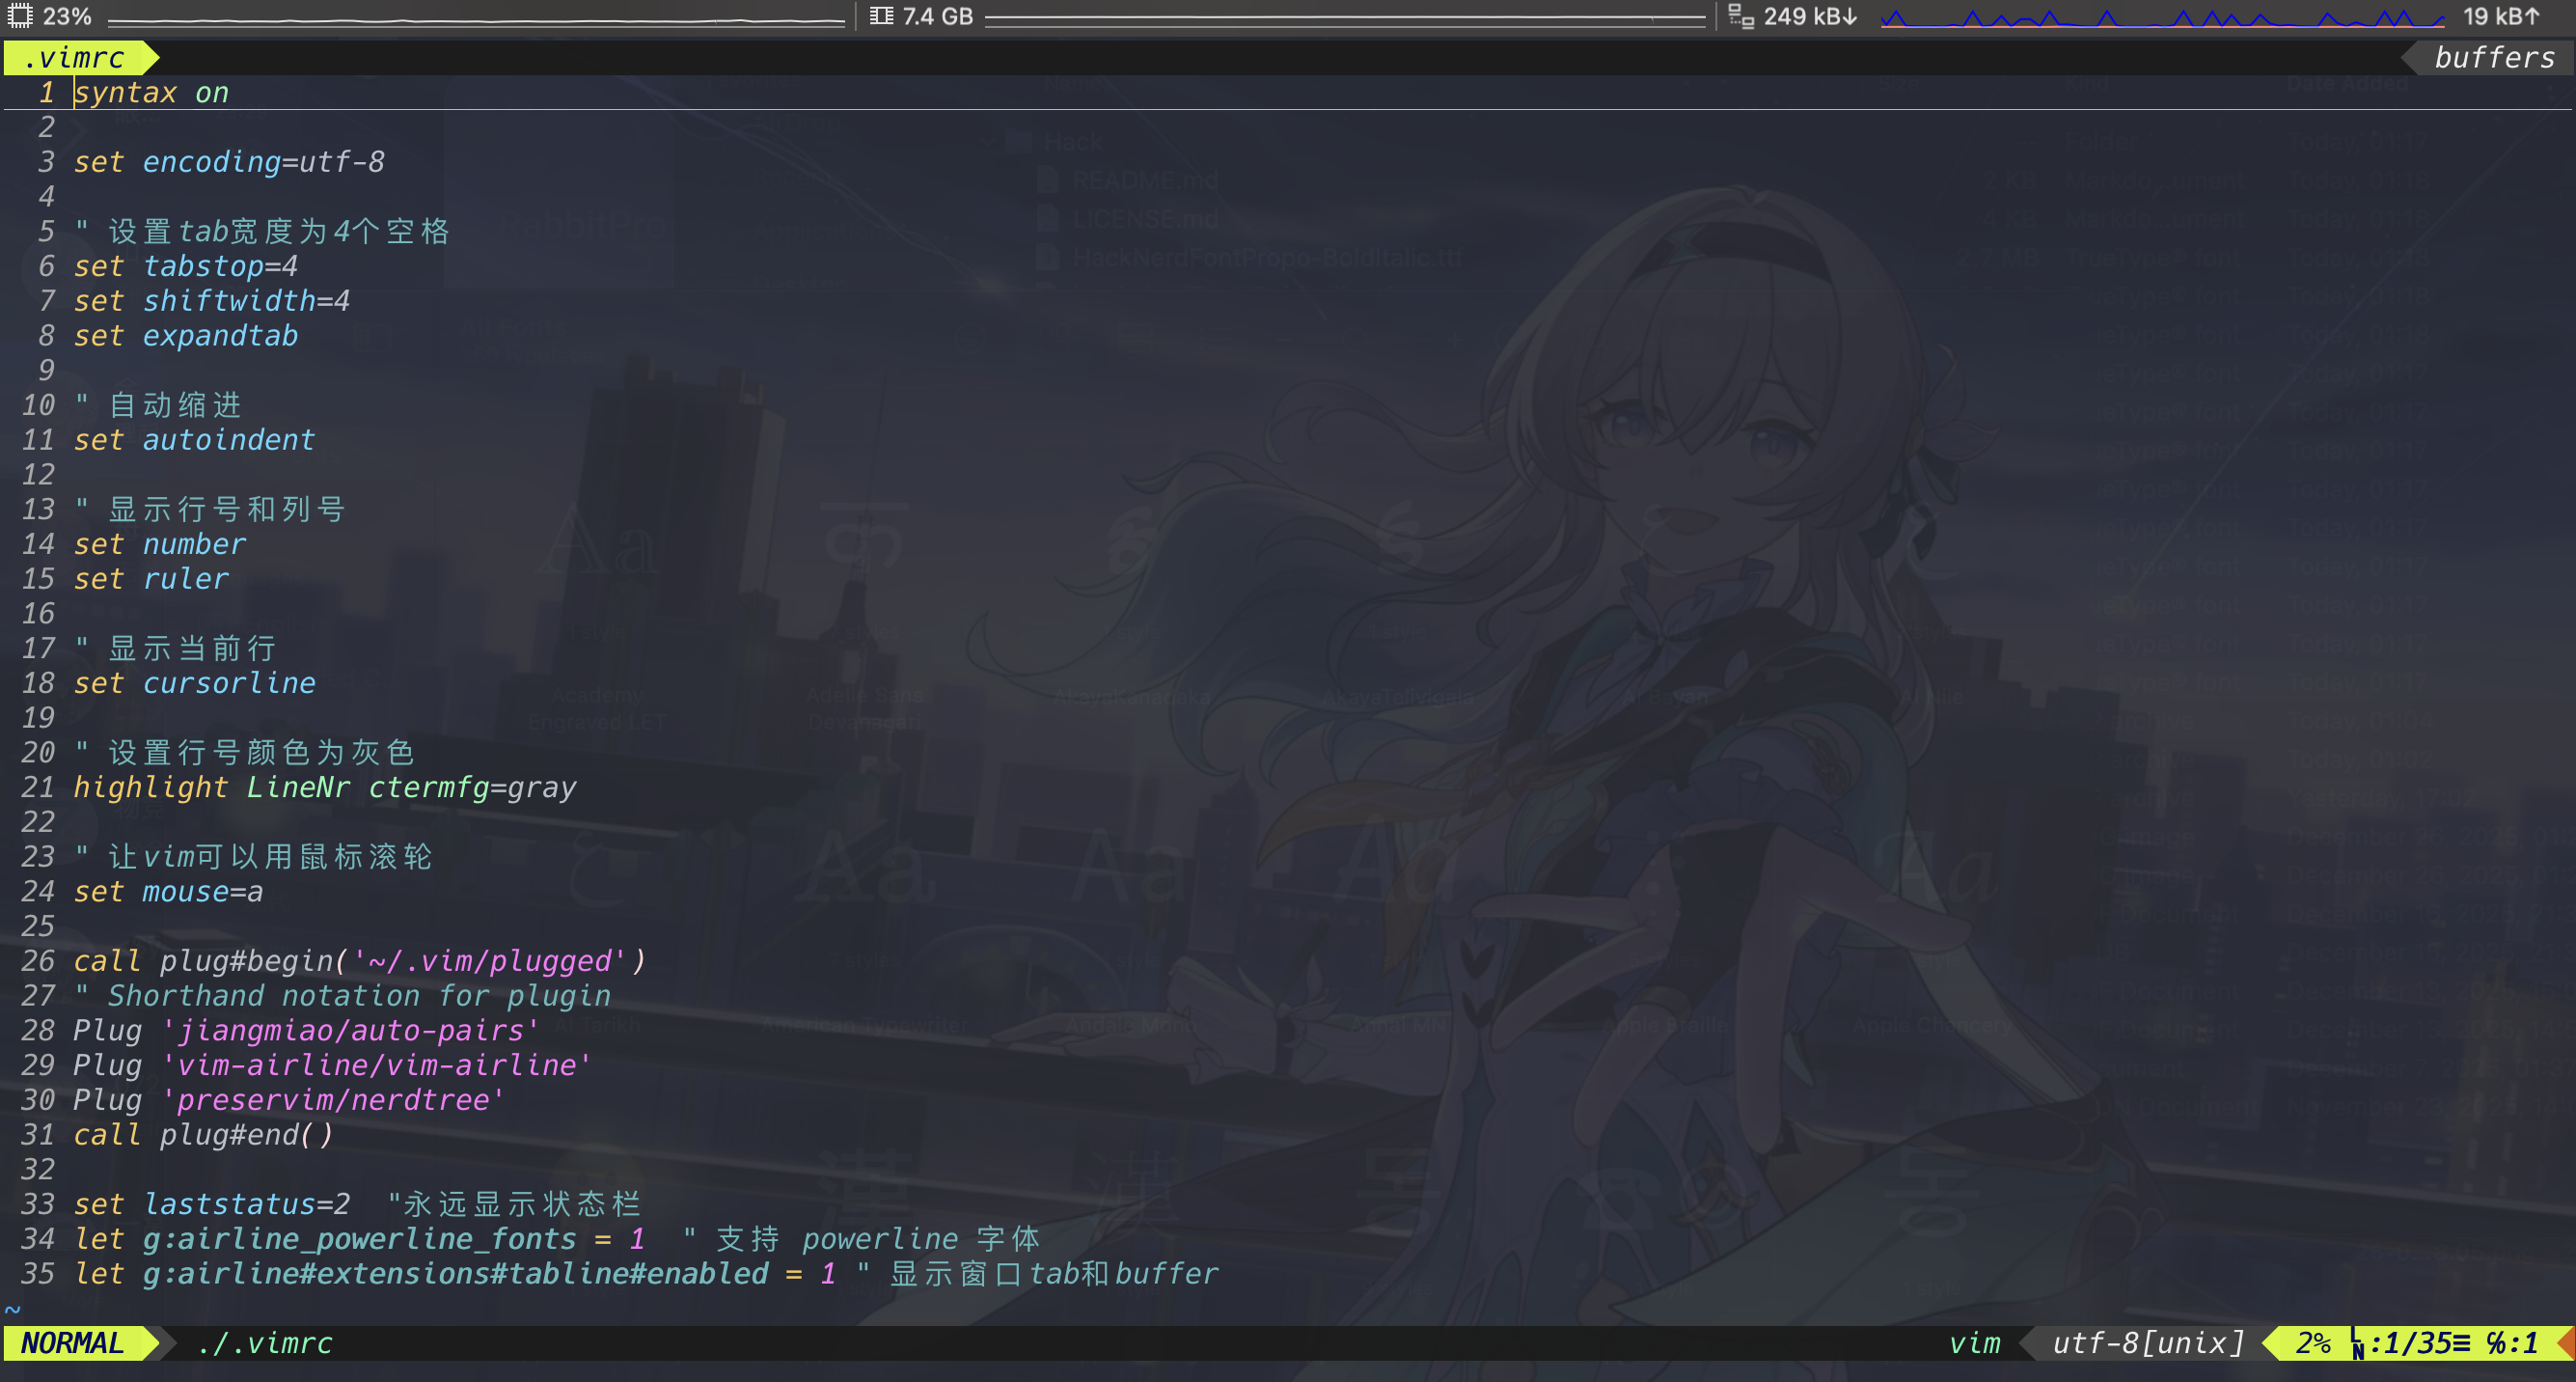
配置 ~/.vimrc
bash
syntax on

" 设置编码为utf-8
set encoding=utf-8

" 设置tab宽度为4个空格
set tabstop=4
set shiftwidth=4
set expandtab

" 自动缩进
set autoindent

" 显示行号和列号
set number
set ruler

" 显示当前行
set cursorline

" 设置行号颜色为灰色
highlight LineNr ctermfg=gray

" 让vim可以用鼠标滚轮
set mouse=a

call plug#begin('~/.vim/plugged')
" Shorthand notation for plugin
Plug 'jiangmiao/auto-pairs'
Plug 'vim-airline/vim-airline'
Plug 'preservim/nerdtree'
call plug#end()

set laststatus=2  "永远显示状态栏
let g:airline_powerline_fonts = 1  " 支持 powerline 字体
let g:airline#extensions#tabline#enabled = 1 " 显示窗口tab和buffer
效果如下:
4. 安装tmux
bash
sudo apt install -y tmux